How to Install Mods on Project Zomboid
Mods for Project Zomboid
Section titled “Mods for Project Zomboid”You can install individual mod files to your server or install a custom mod package that could contain over a hundred individual mods. Mods are easy to install and can easily be changed in the Nitro Panel.
Single Mod Installations Mod Collection Installations
How to Add a Mod to your Project Zomboid Server
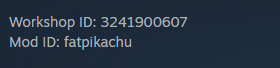
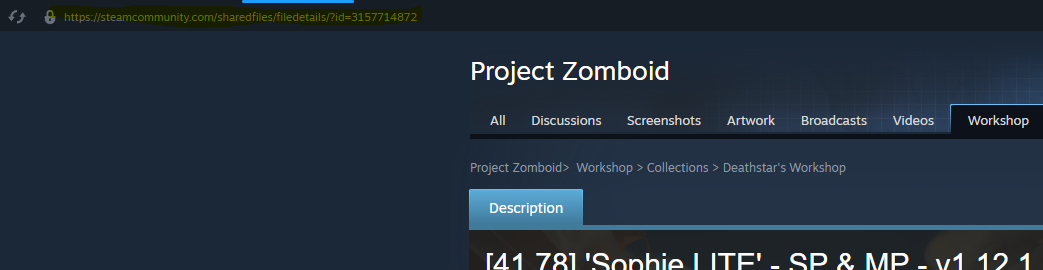
Section titled “How to Add a Mod to your Project Zomboid Server”- From the Steam Workshop, find the Mod you would like and copy its Workshop ID and Mod ID.
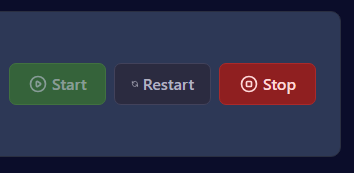
- Log in to the Nitro Panel, Click Manage Server and Stop your server.
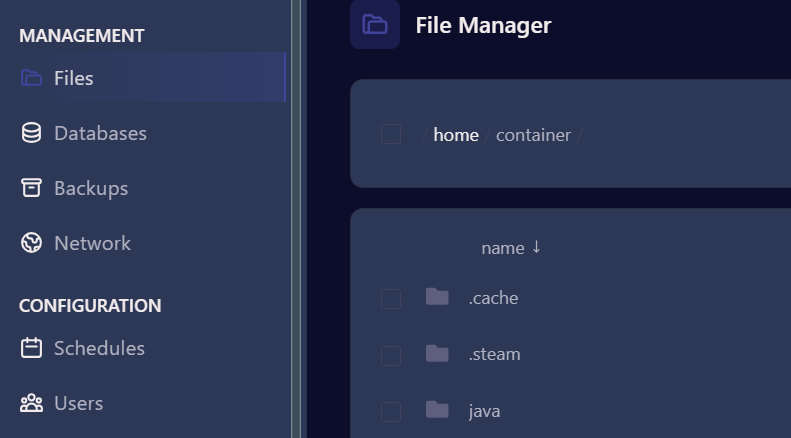
- Click on the Files Tab
-
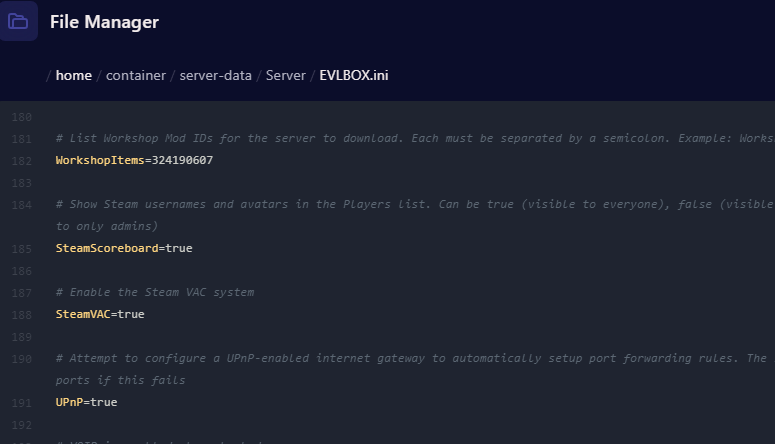
Navigate to server-data/Server/EVLBOX.ini and click on the file.
-
Scroll Down to Line 55 and next to Mods= enter the Mod ID that you want to add.
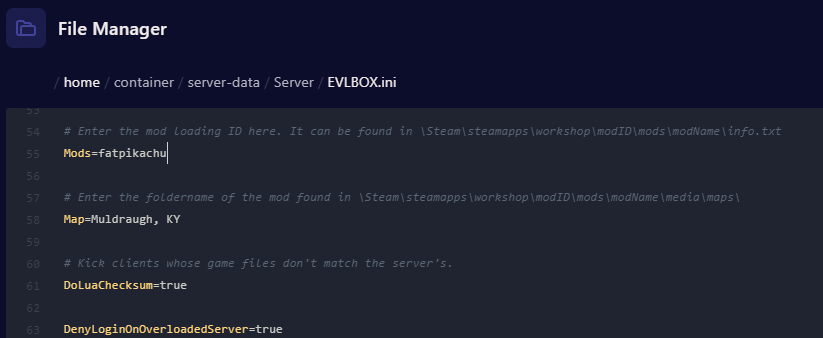
- Scroll down to Line 182 and next to WorkshopItems= enter the Workship ID that you want to add .
- Scroll downa and click save content.

-
Then Start your server and Log in.
-
If you don’t have the mod installed locally, the game will prompt you to install the missing items before you connect.

How to Add a Mod Collection to your Project Zomboid Server
Section titled “How to Add a Mod Collection to your Project Zomboid Server”There are many mod collections available in the steam workshop that contain hundreds of individual moods. If you are wanting to install several mods that you select, you can also create a new mod collection of your own in steamn.
- Copy the URL of the collection you want to add from Steam.
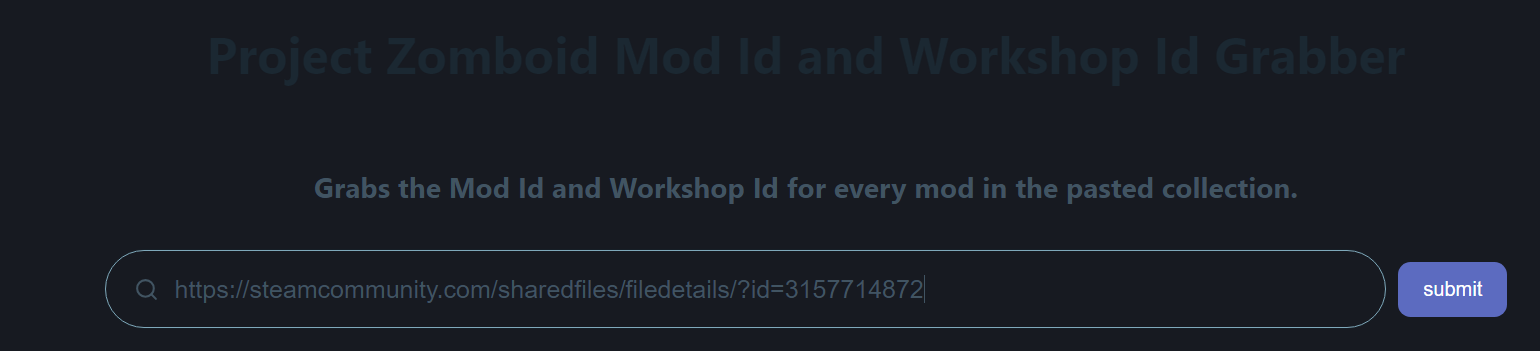
- Go to https://pzidgrabber.com/ and paste in the URL. Click Submit.
-
In a separate tab, navigate to the Nitro Panel. Stop your Server and Navigate to Files and Open the .cache/Server/EVLBOX.ini file.
-
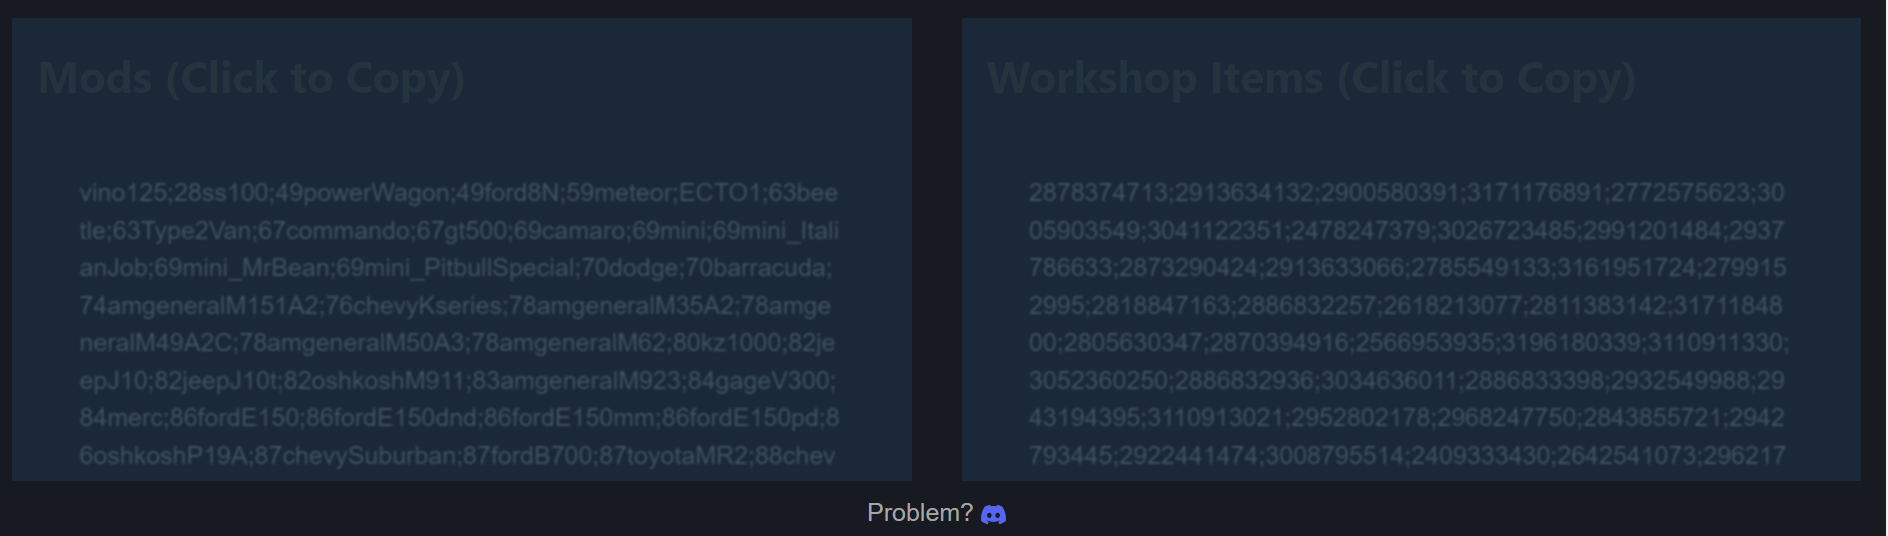
Scroll Down to Line 55 and next to Mods= Copy and Paste the Mods list generated from pzidgrabber.com
-
Then Scroll down to line 182 and next to WorkshopItems= copy and paste the Workshop Items from pzidgrabber.com
- Save the Content and Start Your Server.