According to AWS’s own marketing page, “The Cloud” is supposed to be “easy to use, flexible, and cost-effective”. While this is mostly accurate, we definitely saw room for improvement on the cost-effectiveness side of the equation. While visions of a serverless utopia are on the horizon, there is still strong demand for traditional high-performance compute resources. This is especially so for heavy web apps, game servers, or latency-sensitive applications. While it’s possible to run game servers in the cloud, the cost of dedicated resources is astronomical in comparison to traditional colocation and rolling your own infrastructure.
When it came time to set up our Dallas service location for EVLBOX, we wanted to see if we could approach it in a similar way to building a gaming PC. It’s become so easy to build high-end gaming rigs (for running Minecraft in 4k with all the shaders. Of course at 200fps too!), so we thought: Why not try the same approach for our server infrastructure? Let’s take a look at how that turned out.
(spoilers 🤑💰)
Disclaimer: This approach is definitely not compatible with all business types. Next business day hardware replacement SLA’s, and enterprise-grade equipment definitely have their place and are the bare minimum for some (and rightly so!). But if you are a smaller business, or in start-up mode, then this strategy may be something to consider as an alternative to expensive cloud services.
Part 1: Building the Servers
1.1 Determine your needs
Minecraft and Satisfactory server hosting were our top priorities when assessing our hardware needs. Believe it or not, modern Minecraft servers require very high single core CPU speeds! Typically 3+ GHz, according to the Minecraft Wiki. Satisfactory dedicated servers also eat processor cycles, and the suggestion seems to be higher single-core speeds over having multiple cores. Not to mention that Satisfactory dedicated servers are still in their experimental stage, with many fluctuations in performance when updates are released.
Since we were building out a brand new deployment, we also decided to add 10gbps networking cards to each server. While this is most definitely overkill, it does allow very high burstable speeds when downloading/installing server software from Steam CDN’s. We have seen server installation speed almost double, when compared to just a shared 1gbps nic.
And of course what do Satisfactory servers and Minecraft servers have in common? They both consume gobs of RAM!

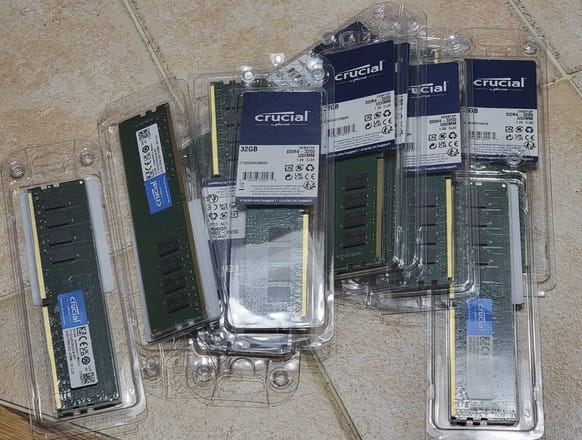
About 512gb of RAM on 16 sticks.
1.2 AMD is on the “Ryze” – Selecting Components
(I’m sorry for the pain you endured reading this pun. I guarantee that I was also harmed in writing it)
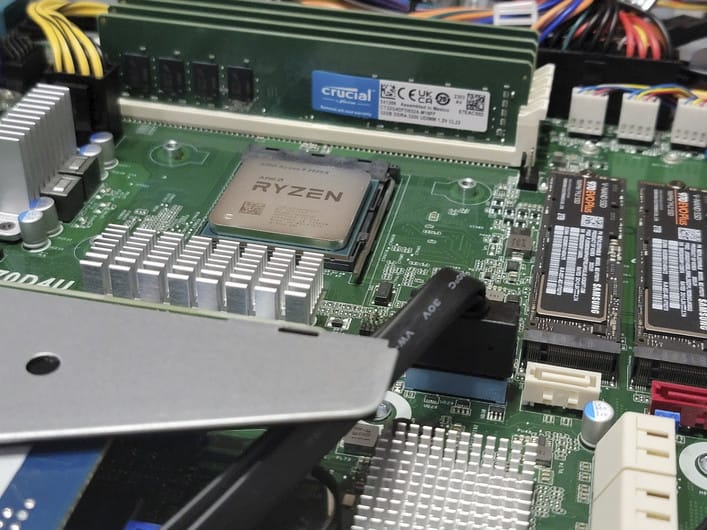
We have to strike a balance between affordable prices, while also still trying to offer higher performing game servers than our competitors. This is why we selected the Ryzen 9 5950x for our initial Dallas deployment. During our benchmarks, we were able to see a single core Geek Bench 6 Score of 2270 on the ASRock Rack X470 platform. We found the price to performance ratio on the Ryzen really tipped the scales in AMD’s favor compared to Intel processors. As with all technology, make sure to do your own testing and research as this may not be the case in the future.
Here’s a quick component list from our server builds:
- ASrockRack X470 1U Server – Barebones Kit
- Ryzen 9 5950x CPU
- 4x 32GB Crucial DDR4 3200Mhz RAM (128GB total per server)
- 2x Samsung 970 Evo 2TB NVME (configured in a RAID1 Array)
- Intel 10gbps PCI-E SFP+ network card
Don’t forget your thermal paste!
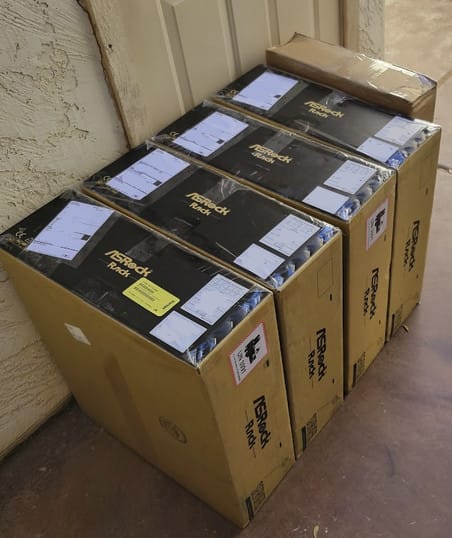
We used the ASRock Rack 1U barebones kit for assembling the servers. Most of the wiring was already done, just add a CPU, memory, storage, and network cards.

1.3 Time to Build and Test
With components delivered, and storage space at an all time low, it’s time to build and get these servers off to the datacenter! If you’ve ever built a PC, building a server is really no different. There are some careful considerations to make, especially when you decide to cram a 105w TDP processor into a 1U server chassis (1.75” of vertical clearance!). Luckily, this kit from ASRock accounted for that and supplied a passive heatsink capable of keeping the CPU cool. There are watercooling kits that can be used for 1U servers as well.

ASrock Rack x470 barebones kit
With assembly finished, it’s a good idea to run some load tests. Prime95 and BurnInTest are good tools to give you some peace of mind. Gotta make sure your server is working and not failing before sending it off to the salt mines!

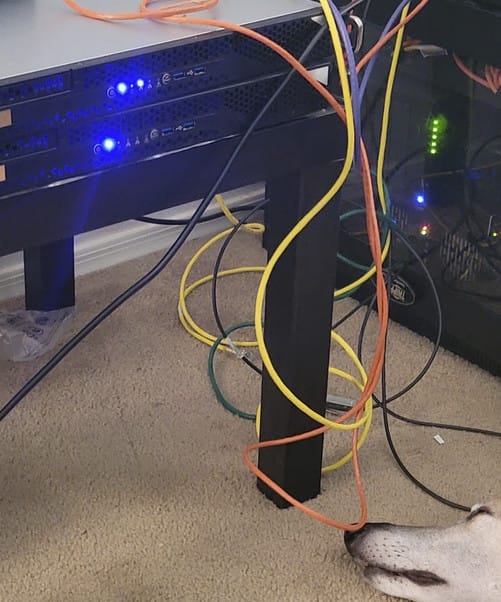
Crown the Greyhound seems to enjoy the sound of 1u fans spinning at 10,000 RPM
Some initial setup needs to be done on the servers before they are shipped out. Things like mapping IP’s to the network interfaces, and prepping the firewall and switches in advance. We needed to make sure our admin team could VPN in and complete setup remotely. Since all of our servers have 4 network ports, and most of them were in use, I found it helpful to label the server ports. This made setup go a bit faster, and helped to avoid patching to the wrong place.

Enterprise-type hardware, like Dell servers, usually do a great job at labeling network ports on the back of the server, alas the ASRock kit didn’t have this. A bit more hands-on work here, but definitely doable with a smaller budget.
Part 2: Colocation Setup
Colocation providers offer space, cooling, power, and internet for your servers. Some colocation providers also include: hardware maintenance, large IP address blocks, DDoS protection services, and remote hands. Prices can vary wildly, but it’s typically dependent on your needs.
Since we don’t have any staff anywhere near Dallas, we needed to find a provider that had staff in the datacenter 24/7. Just in case we have any problems or need hardware swaps (this is where remote hands service comes into play!). SLA, facility security, redundancy, acceptable usage policies, and terms of service are all things to take into consideration when shopping for a colo provider. One thing you want to avoid is having to move colocation providers after setting up. Don’t add any unnecessary steps to make things harder!
2.1 Shipping / Setup
We selected Tier.net as our colocation provider. Their team was fantastic at answering our questions, and getting all the particulars of the rack sorted out (IP addresses, power, hand offs etc). So now it is time to ship out the equipment to the Datacenter.
Since we don’t have any staff anywhere near Dallas, we needed to find a provider that had staff in the datacenter 24/7. Just in case we have any problems or need hardware swaps (this is where remote hands service comes into play!). SLA, facility security, redundancy, acceptable usage policies, and terms of service are all things to take into consideration when shopping for a colo provider. One thing you want to avoid is having to move colocation providers after setting up. Don’t add any unnecessary steps to make things harder!
2.1 Shipping / Setup
We selected Tier.net as our colocation provider. Their team was fantastic at answering our questions, and getting all the particulars of the rack sorted out (IP addresses, power, hand-offs, etc.).
With our provider picked out, it‘s finally time to ship out the equipment to the Datacenter!

Next stop, Dallas
2.2 Setup Day
Once our equipment arrived at the datacenter and was checked for damage, the on-site staff got to work racking the servers and switches, having wired them up as instructed. Our admin team then validated that our VPN was working as expected, able to see all of our servers and management interfaces. There were a few hiccups, such as our power cables not fitting snug in the power sockets, and some of the server rails not quite fitting as expected. In my 15 years of working in the IT field, you definitely have to plan for some logistical cushion to account for possible errors that come up. Shipping delays or parts that don’t quite fit are just a couple examples of what could happen.
Costs and Final Thoughts
Our first four-server fleet cost about $8,000, and took about 10 work hours to assemble and test. We also needed some network switch gear and cabling.Shipping costs also came into play, which brings the grand total to about $10,000. Our monthly colocation bill is just under $1,000.
Checking on pricing at AWS, we would need two r7i.2xlarge (64gb RAM, 8x CPU cores, and a single core bench of around 2,000 on Geekbench) instances for each of our four servers. With 1 year of reserved pricing on AWS, that puts our monthly compute costs at $2,000/mo. Add on the needed EBS storage (about 4-5TB), and that adds an additional $500/mo to our AWS bill. This doesn’t even include network bandwidth or additional IPv4 addresses.
While this is just quick napkin math that doesn’t calculate all of the possible costs, you can see that the savings can add up quickly.
Even with accounting for some margin of error:
3 Years of AWS hosting = ~$93,000
3 Year of Colo + Hardware = ~$46,000
With the $47,000 in savings over a 3 year period, we can buy 4 more of our “Phase 1” fleets, and still have a huge budget leftover. With the leftovers, we could take care of hardware failures, parts, maintenance, and even a company vacation to Maui!
Some potential caveats I’d like to point out:
- ASRock Rack is somewhere between consumer and enterprise-grade hardware (limited support, potential for bugs, security vulnerabilities with management interfaces)
- Ryzen processors are aimed at consumers, and not enterprise
- Plan for the process of scaling up your hardware fleet to take about a month, due to long lead times or part scarcity (not compatible with all businesses)
Overall, we are extremely pleased with how our DIY infrastructure deployment has gone, and we intend to continue to expand our Dallas location with additional company-owned infrastructure. We have so much control over our infrastructure, and thanks to some slightly overzealous hardware specs, we will see quite a few years of stable service provided from our Dallas location! We very much recommend this process as an even more cost-effective solution to hosting servers, and hope it is as successful for you as it was for us.


