Getting Started
This guide covers finding your server address, connecting in-game, managing your whitelist, and granting admin privileges.
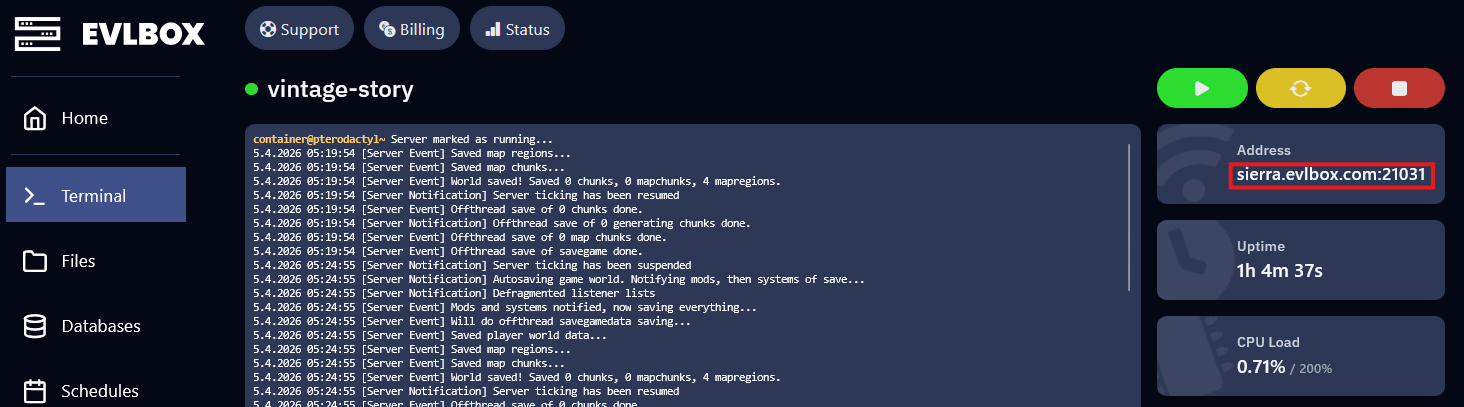
Finding Your Server Address
Section titled “Finding Your Server Address”- Log in to nitro.evlbox.com.
- Select your Vintage Story server from the server list.
- Your server’s address is displayed on the main dashboard page. Click it to copy it to your clipboard — it will be in
hostname:portformat.
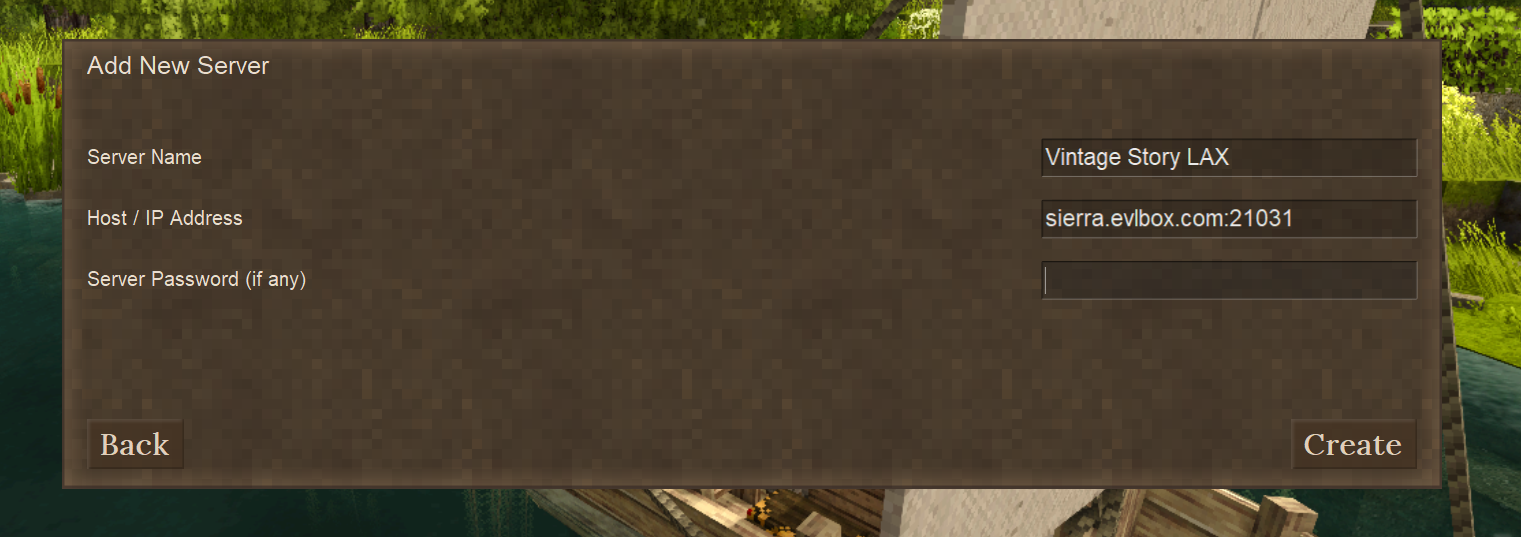
How to Connect to Your Server
Section titled “How to Connect to Your Server”- Launch Vintage Story and click Multiplayer from the main menu.
- Click Add Server.
- Paste your server address into the Host / IP Address field (include the port, e.g.,
us1.evlbox.com:42420). - Click Join to connect.
How to Set Up a Whitelist
Section titled “How to Set Up a Whitelist”The whitelist restricts your server to approved players only. By default, EVLBOX servers start with the whitelist off so anyone with the address can join. You can change this from the panel or in-game.
From the Panel (Startup Tab)
Section titled “From the Panel (Startup Tab)”- In the EVLBOX panel, go to the Startup tab.
- Find the Whitelist Mode variable.
- Set it to
2to enable the whitelist,1to disable it, or0for the game’s default behavior. - Restart your server for the change to take effect.

Managing Whitelisted Players
Section titled “Managing Whitelisted Players”Once the whitelist is enabled, use the server console (in the Console tab on the panel, or in-game chat as an admin) to add and remove players:
Add a player to the whitelist:
/player PlayerName whitelist onRemove a player from the whitelist:
/player PlayerName whitelist offReplace PlayerName with the player’s exact in-game username.
How to Grant Admin Privileges
Section titled “How to Grant Admin Privileges”Admin (operator) players have access to all server commands in-game.
- In the EVLBOX panel, open the Console tab.
- Run the following command, replacing
PlayerNamewith the player’s in-game name:/op PlayerName
To change a player back to a regular role:
/player PlayerName role suplayer