Windrose World & Save Management
Each Windrose server can hold multiple worlds, but only one runs at a time — controlled by the WorldIslandId field in R5/ServerDescription.json. All world data lives under R5/Saved/.
Server file layout
Section titled “Server file layout”Here’s the layout of the relevant folders on your EVLBOX Windrose server:
DirectoryR5/
- ServerDescription.json
DirectorySaved/
DirectoryConfig/
- …
DirectoryLogs/
- …
DirectorySaveProfiles/
DirectoryDefault/
DirectoryRocksDB/
Directory0.10.0 game version folder
DirectoryWorlds/
DirectoryE24A22C9C8D3448951AFD002162576D5/ world ID folder
- WorldDescription.json
- … world database files
- … additional world folders
The <game version> folder is named after the dedicated server version (e.g. 0.10.0) and changes when Windrose updates. Each world folder is named with a unique world ID.
Difficulty presets
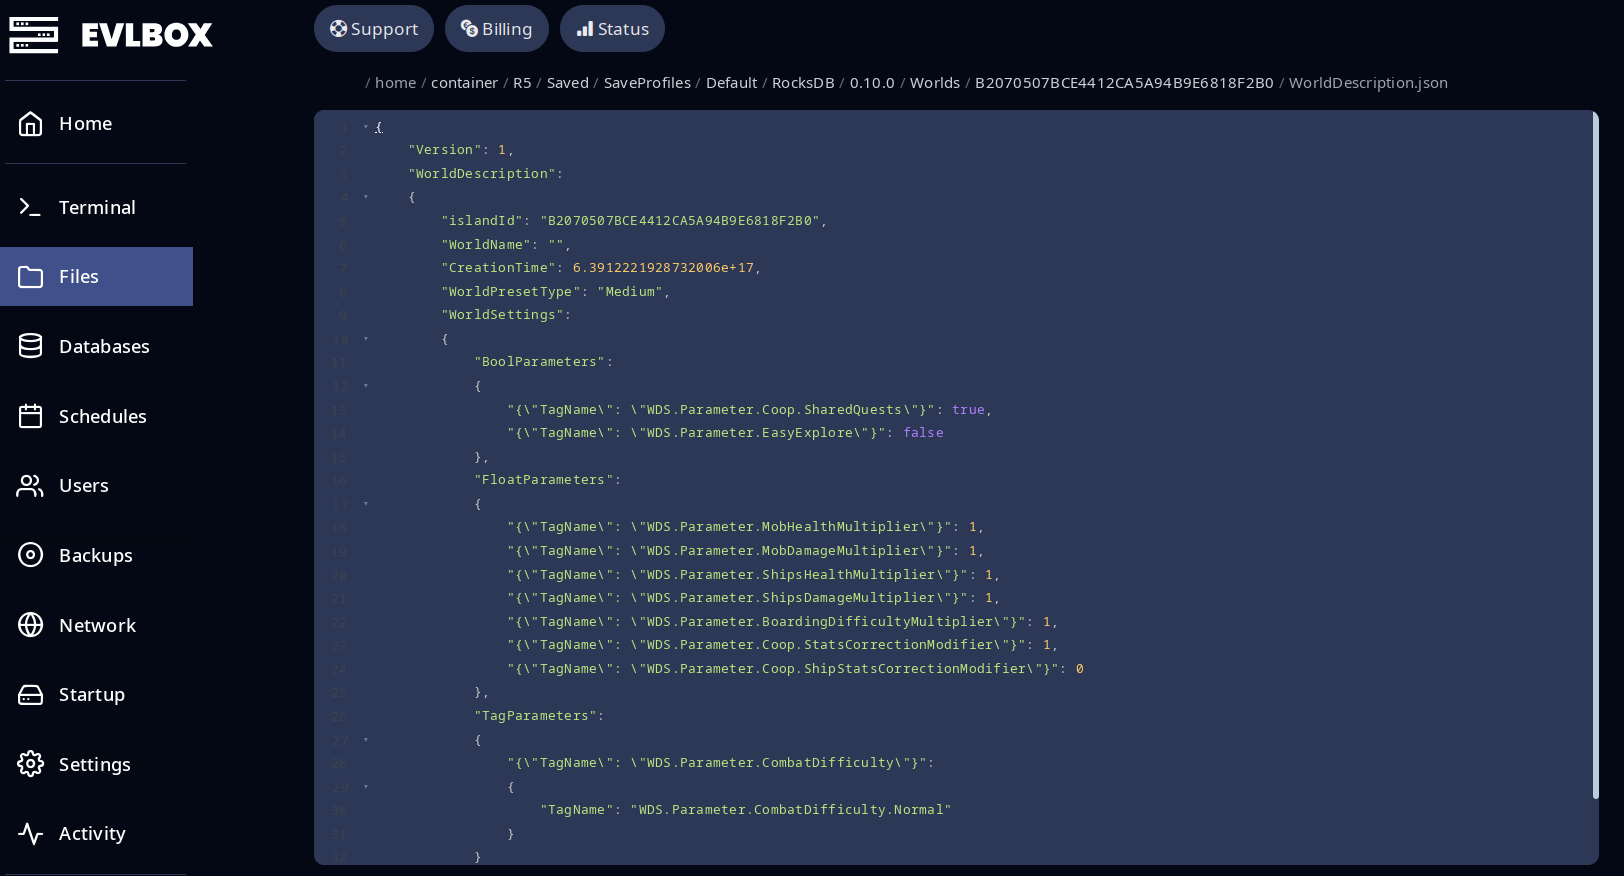
Section titled “Difficulty presets”Each world’s WorldDescription.json has a WorldPresetType field with one of three values: Easy, Medium, or Hard. These set the multipliers in WorldSettings:
| Preset | Mob HP | Mob DMG | Ship HP | Ship DMG | Boarding | Combat |
|---|---|---|---|---|---|---|
Easy | ×0.7 | ×0.6 | ×0.7 | ×0.6 | ×0.7 | Easy |
Medium | ×1.0 | ×1.0 | ×1.0 | ×1.0 | ×1.0 | Normal |
Hard | ×1.5 | ×1.25 | ×1.5 | ×1.25 | ×1.5 | Hard |
To customize individual values, edit the multipliers in WorldSettings directly. On the next launch the server will detect that the values don’t match any preset and flip WorldPresetType to Custom for you — you don’t set Custom yourself.
The full list of custom parameters (mob/ship multipliers, boarding difficulty, co-op stat correction, combat difficulty, etc.) and their valid ranges is in the official Windrose dedicated server guide.
Switching between multiple worlds
Section titled “Switching between multiple worlds”You can store as many worlds on your server as you want, but only one runs at a time.
- Stop your server.
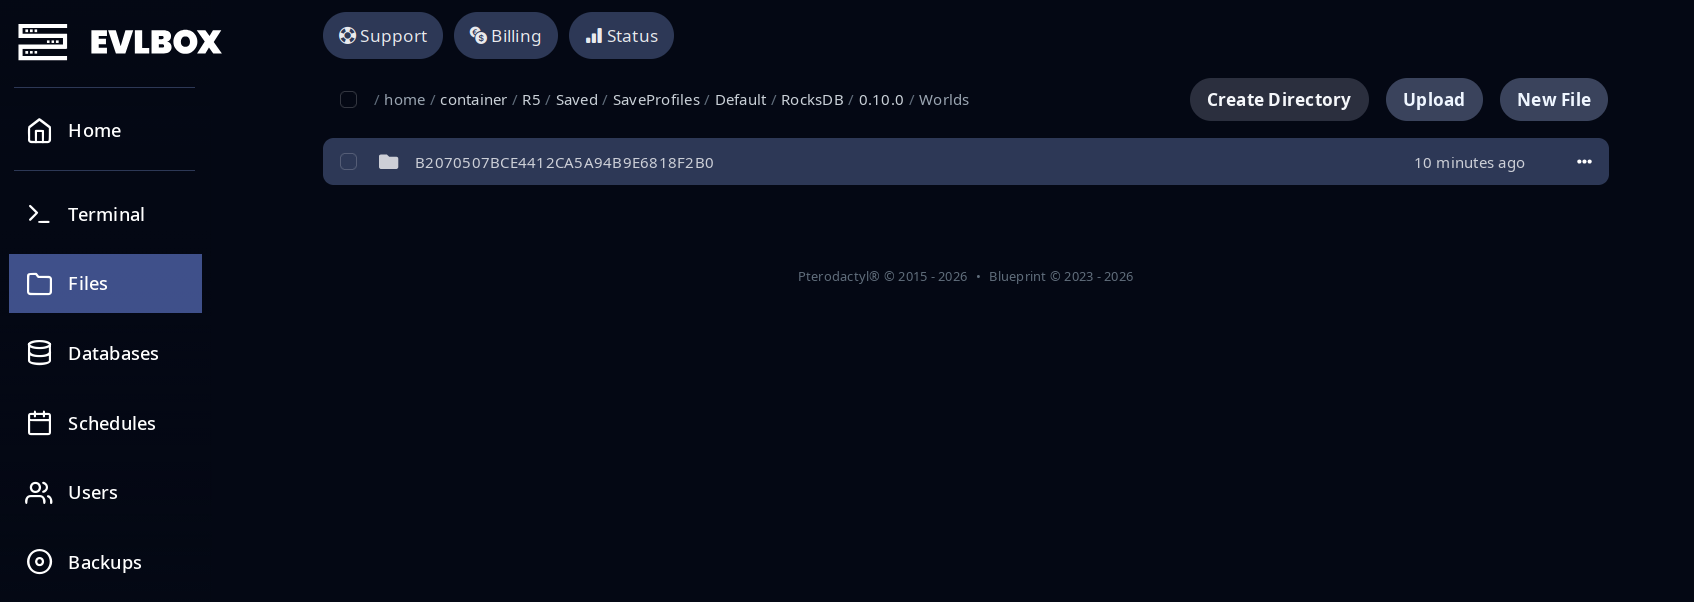
- Open the Files tab and navigate to
R5/Saved/SaveProfiles/Default/RocksDB/<game version>/Worlds/. - Note the folder name (the world ID) of the world you want to load.
- Open
R5/ServerDescription.jsonand setWorldIslandIdto that folder name. - Save and start the server.
Uploading a singleplayer save
Section titled “Uploading a singleplayer save”You can move a world from your local game into your dedicated server via SFTP.
1. Find your local save
Section titled “1. Find your local save”On your local PC, find your world folder. The path varies by platform:
- Steam / EGS:
C:\Users\<you>\AppData\Local\R5\Saved\SaveProfiles\<profile>\RocksDB\<game version>\Worlds\<world id> - Stove:
C:\Users\<you>\AppData\Local\R5\Saved\SaveProfiles\StoveDefault\RocksDB\<game version>\Worlds\<world id>
2. Get your server’s SFTP details
Section titled “2. Get your server’s SFTP details”We recommend Cyberduck — the built-in file manager doesn’t handle nested folder uploads well.
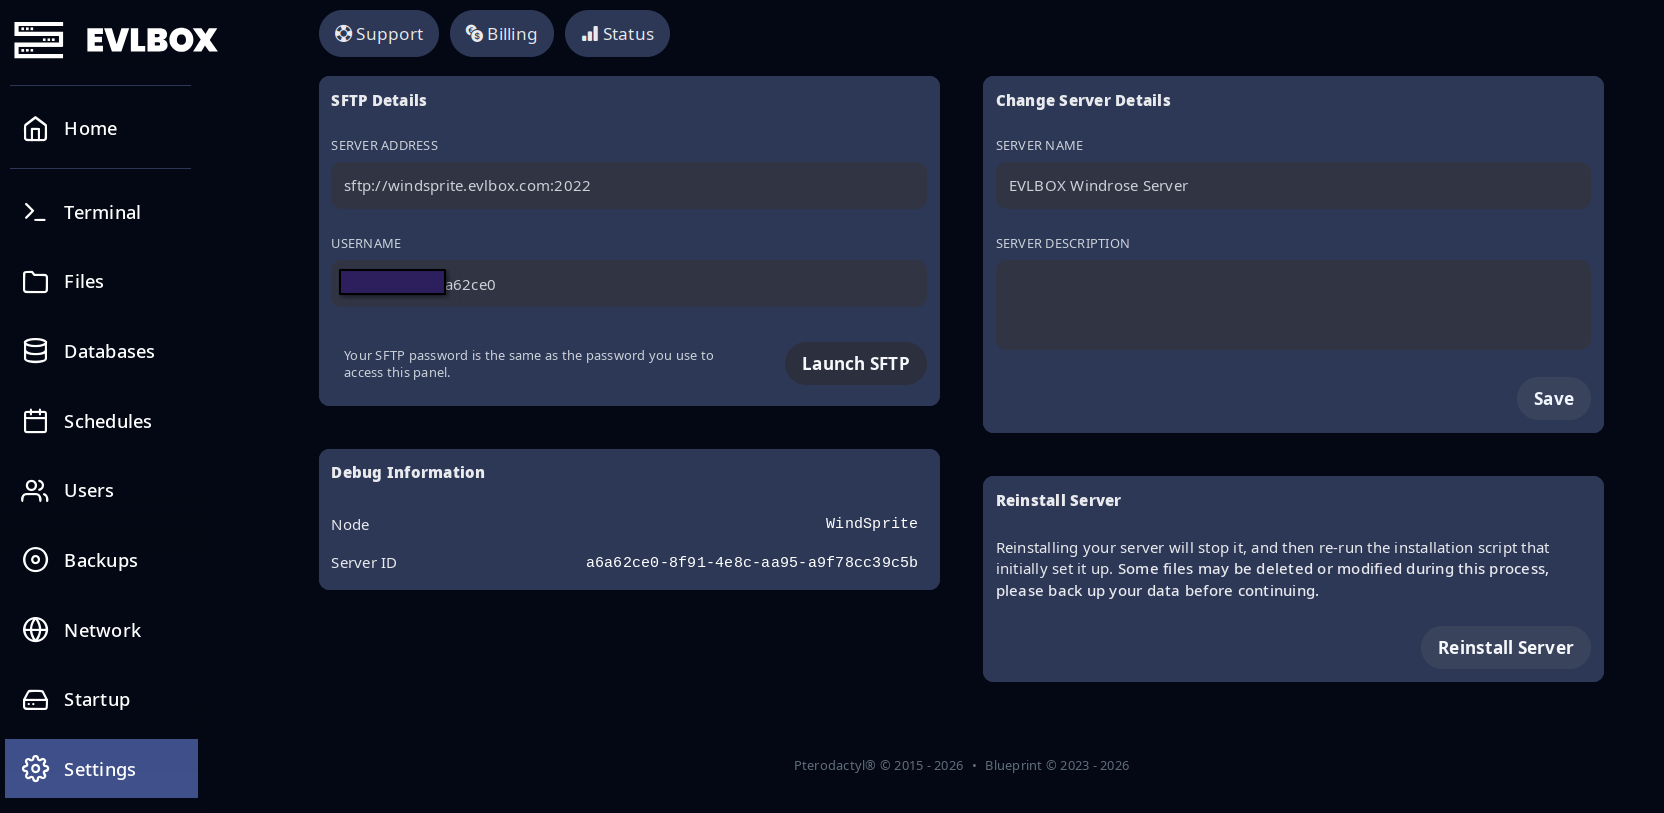
- In the Nitro panel, open the Settings tab for your Windrose server.
- The page shows the SFTP address, port, and username to use. Your password is your Nitro panel password.
3. Upload the world folder
Section titled “3. Upload the world folder”- Stop your Windrose server.
- Connect with Cyberduck using the details from above.
- Navigate to
R5/Saved/SaveProfiles/Default/RocksDB/<game version>/Worlds/. - Drag your entire world folder into that directory, keeping its original folder name.
- Open
R5/ServerDescription.jsonand setWorldIslandIdto the exact name of the folder you just uploaded. - Start the server.
To go the other way (server → local), reverse the steps. When the game asks, choose the local copy of the save.
Backups
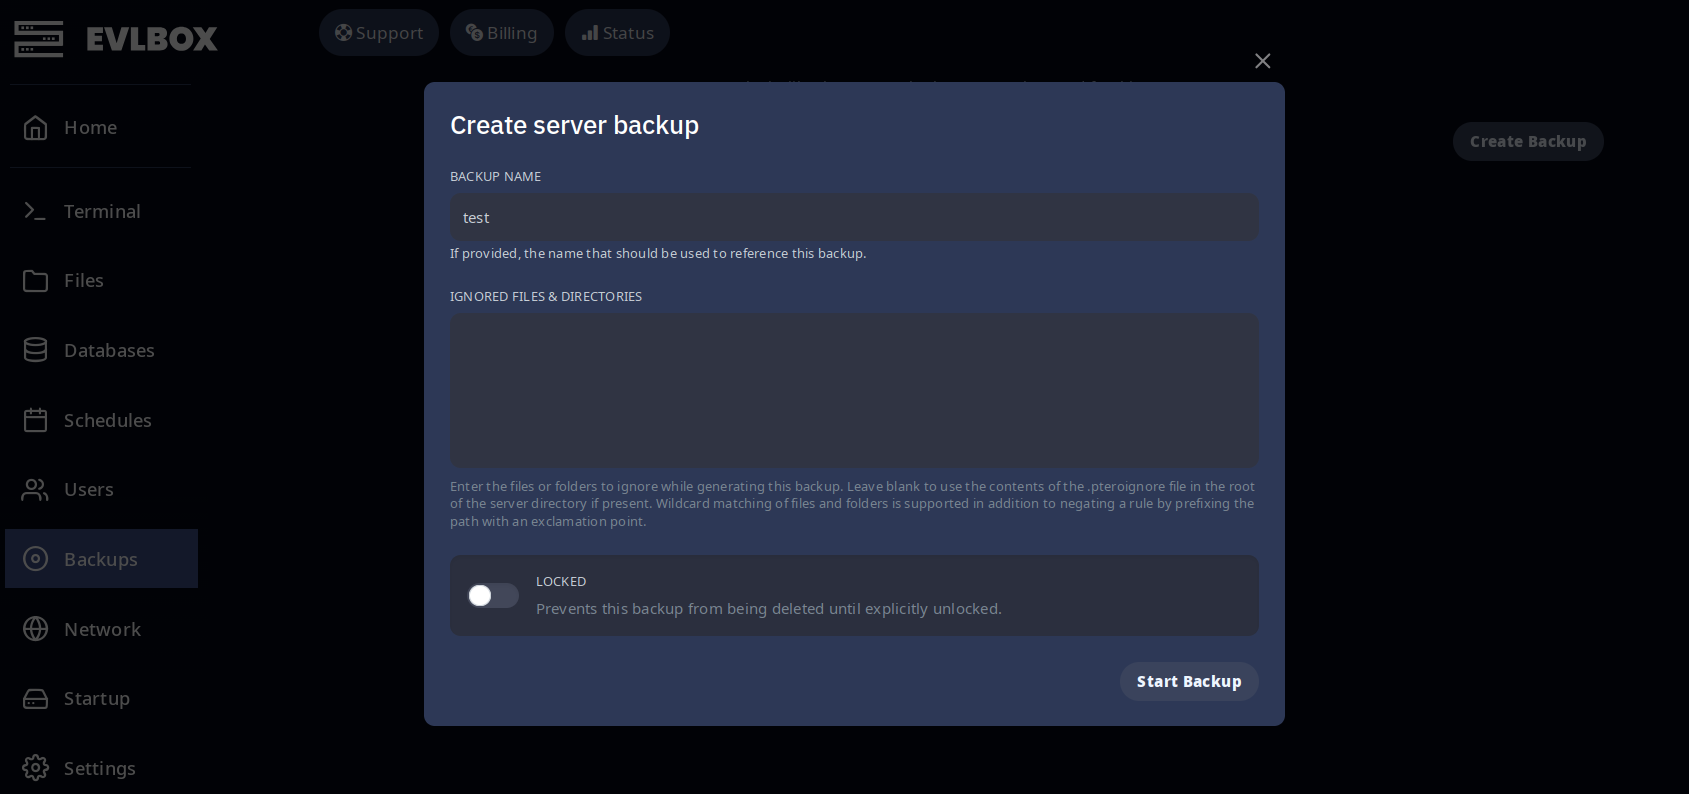
Section titled “Backups”EVLBOX Windrose plans include backup slots managed from the Backups tab in the Nitro panel. Click Create Backup, set a name, and optionally specify an ignore-files path.
Take a backup before:
- Switching
WorldIslandIdto a different world - Uploading a singleplayer save over an existing world
- Editing
WorldDescription.jsonfor a live world - Major game updates
Restoring a backup rolls the entire R5/Saved directory back to that point.
Have a crew but no server? Grab a server here.