
Vintage Story Server Configuration
Your Vintage Story server has two types of settings:
- Panel-managed settings — controlled from the Startup tab in the EVLBOX panel. These are written to
serverconfig.jsonon every server start and will override manual edits. - File-managed settings — edited directly in
data/serverconfig.jsonthrough the file manager. These are yours to customize freely.
Server File Structure
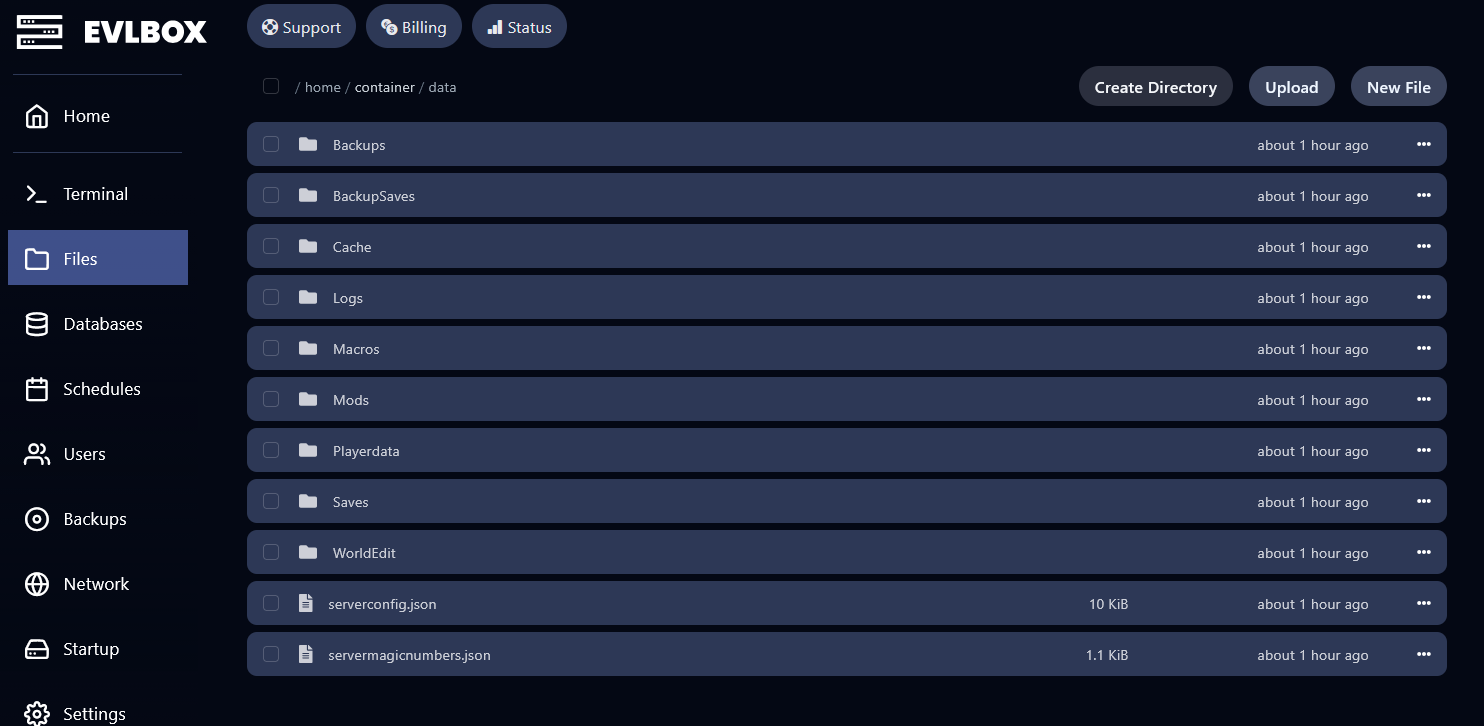
Section titled “Server File Structure”Here’s how your Vintage Story server is organized in the file manager. Most of your work will be inside the data/ folder.
Directorydata/
- serverconfig.json Panel + manual settings
DirectorySaves/
- default.vcdbs World save file
DirectoryMods/
- example-mod.zip
DirectoryBackups/
- …generated by /genbackup
DirectoryLogs/
- …
Directoryassets/
- …
DirectoryLib/
- …
- VintagestoryServer
Panel-Managed Settings (Startup Tab)
Section titled “Panel-Managed Settings (Startup Tab)”These settings are configured in the Startup tab of the EVLBOX panel. Change the value, restart your server, and it takes effect automatically.
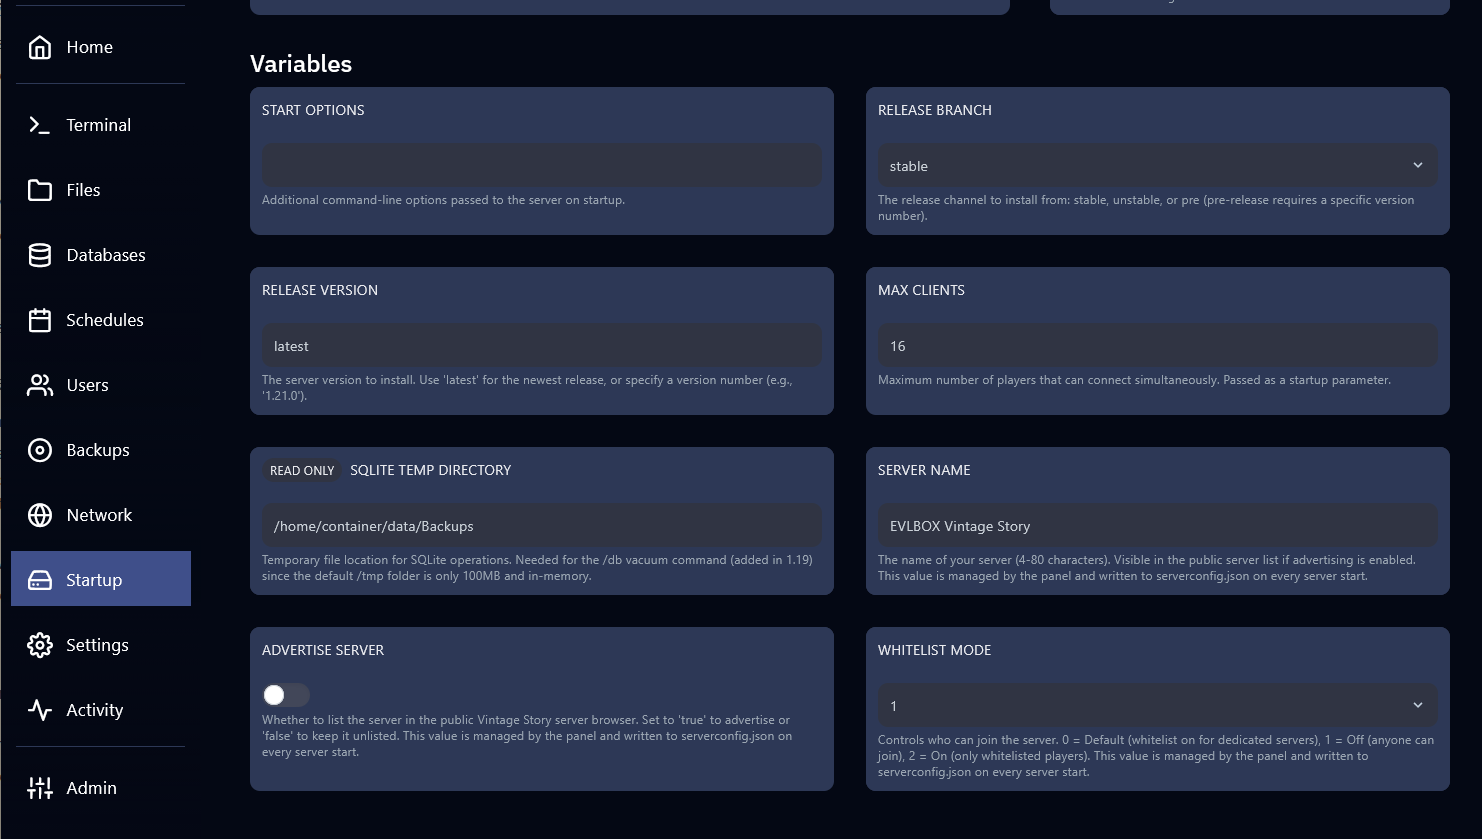
| Variable | Description | Default |
|---|---|---|
| Server Name | Your server’s name in the server browser (4-80 characters) | EVLBOX Server |
| Advertise Server | Toggle whether your server appears in the public VS server browser | Off |
| Whitelist Mode | 0 = Default, 1 = Off (anyone can join), 2 = On (whitelisted only) |
1 (Off) |
File-Managed Settings (serverconfig.json)
Section titled “File-Managed Settings (serverconfig.json)”All other settings are edited directly in data/serverconfig.json. The panel does not touch these — your changes are preserved across restarts.
Accessing the Config File
Section titled “Accessing the Config File”- Log in to the EVLBOX panel and stop your server.
- Navigate to the Files tab.
- Open the
datafolder and click onserverconfig.json. - Make your changes and click Save.
- Start your server.
Common Settings Reference
Section titled “Common Settings Reference”| Field | Description | Example |
|---|---|---|
WelcomeMessage |
Message shown to players when they connect. Use {0} for the player’s name. |
"Welcome {0} to our server!" |
Password |
Require a password to join. Set to "" or null for no password. |
"secretpass" |
AllowPvP |
Enable or disable player-versus-player combat. | true or false |
MaxClients |
Maximum number of connected players. Also set via Startup tab. | 16 |
ServerDescription |
Longer description shown in the public server browser. | "A friendly survival server" |
Enabling / Disabling PvP
Section titled “Enabling / Disabling PvP”In data/serverconfig.json, find the AllowPvP field:
"AllowPvP": falseSet to true to allow PvP or false to disable it. Save the file and restart your server.
Setting a Server Password
Section titled “Setting a Server Password”To require a password for players to join, set the Password field in data/serverconfig.json:
"Password": "yourpassword"To remove the password, set it to an empty string or null:
"Password": ""Setting a Welcome Message (MOTD)
Section titled “Setting a Welcome Message (MOTD)”The WelcomeMessage field controls the message shown to every player when they connect. Use {0} as a placeholder for the player’s name:
"WelcomeMessage": "Welcome {0} to our server! Type /help for commands."Making Your Server Public or Private
Section titled “Making Your Server Public or Private”Server visibility is controlled by the Advertise Server variable in the Startup tab:
- On — your server appears in the Vintage Story public server browser.
- Off — your server is unlisted; players need the direct address to connect.