
How to Connect to your 7 Days to Die Server
This guide covers naming your server, setting a password, and every way to join it — from PC, by direct IP, and from a console.
1. Set the server name and password
Section titled “1. Set the server name and password”- Log in to the Nitro Panel and open your 7 Days to Die server.
- Stop the server if it’s running.
- Open the Startup tab.
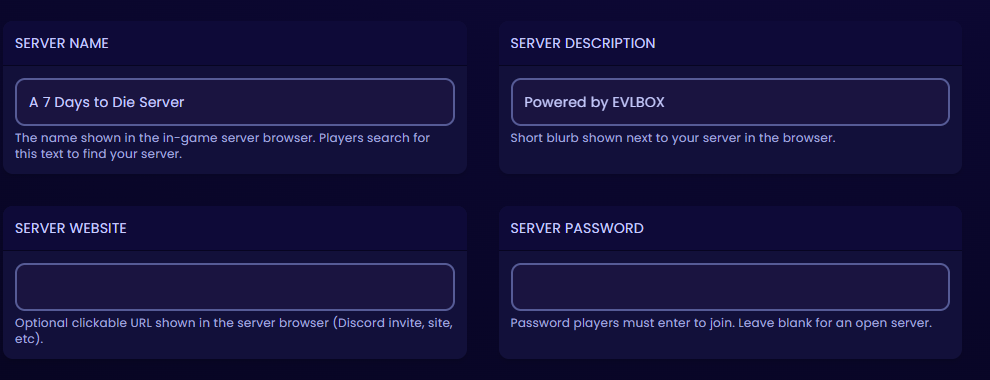
- In Server Name, enter the name players will search for. Be specific — something like
Servergets buried under thousands of others. - In Server Password, set a password if you want the server private. Leave it blank for an open server.
- Go to the Console tab and start the server.
2. Join from the in-game server browser
Section titled “2. Join from the in-game server browser”This is the easiest route and works for most players.
- Check the Console tab and confirm the server has finished starting.
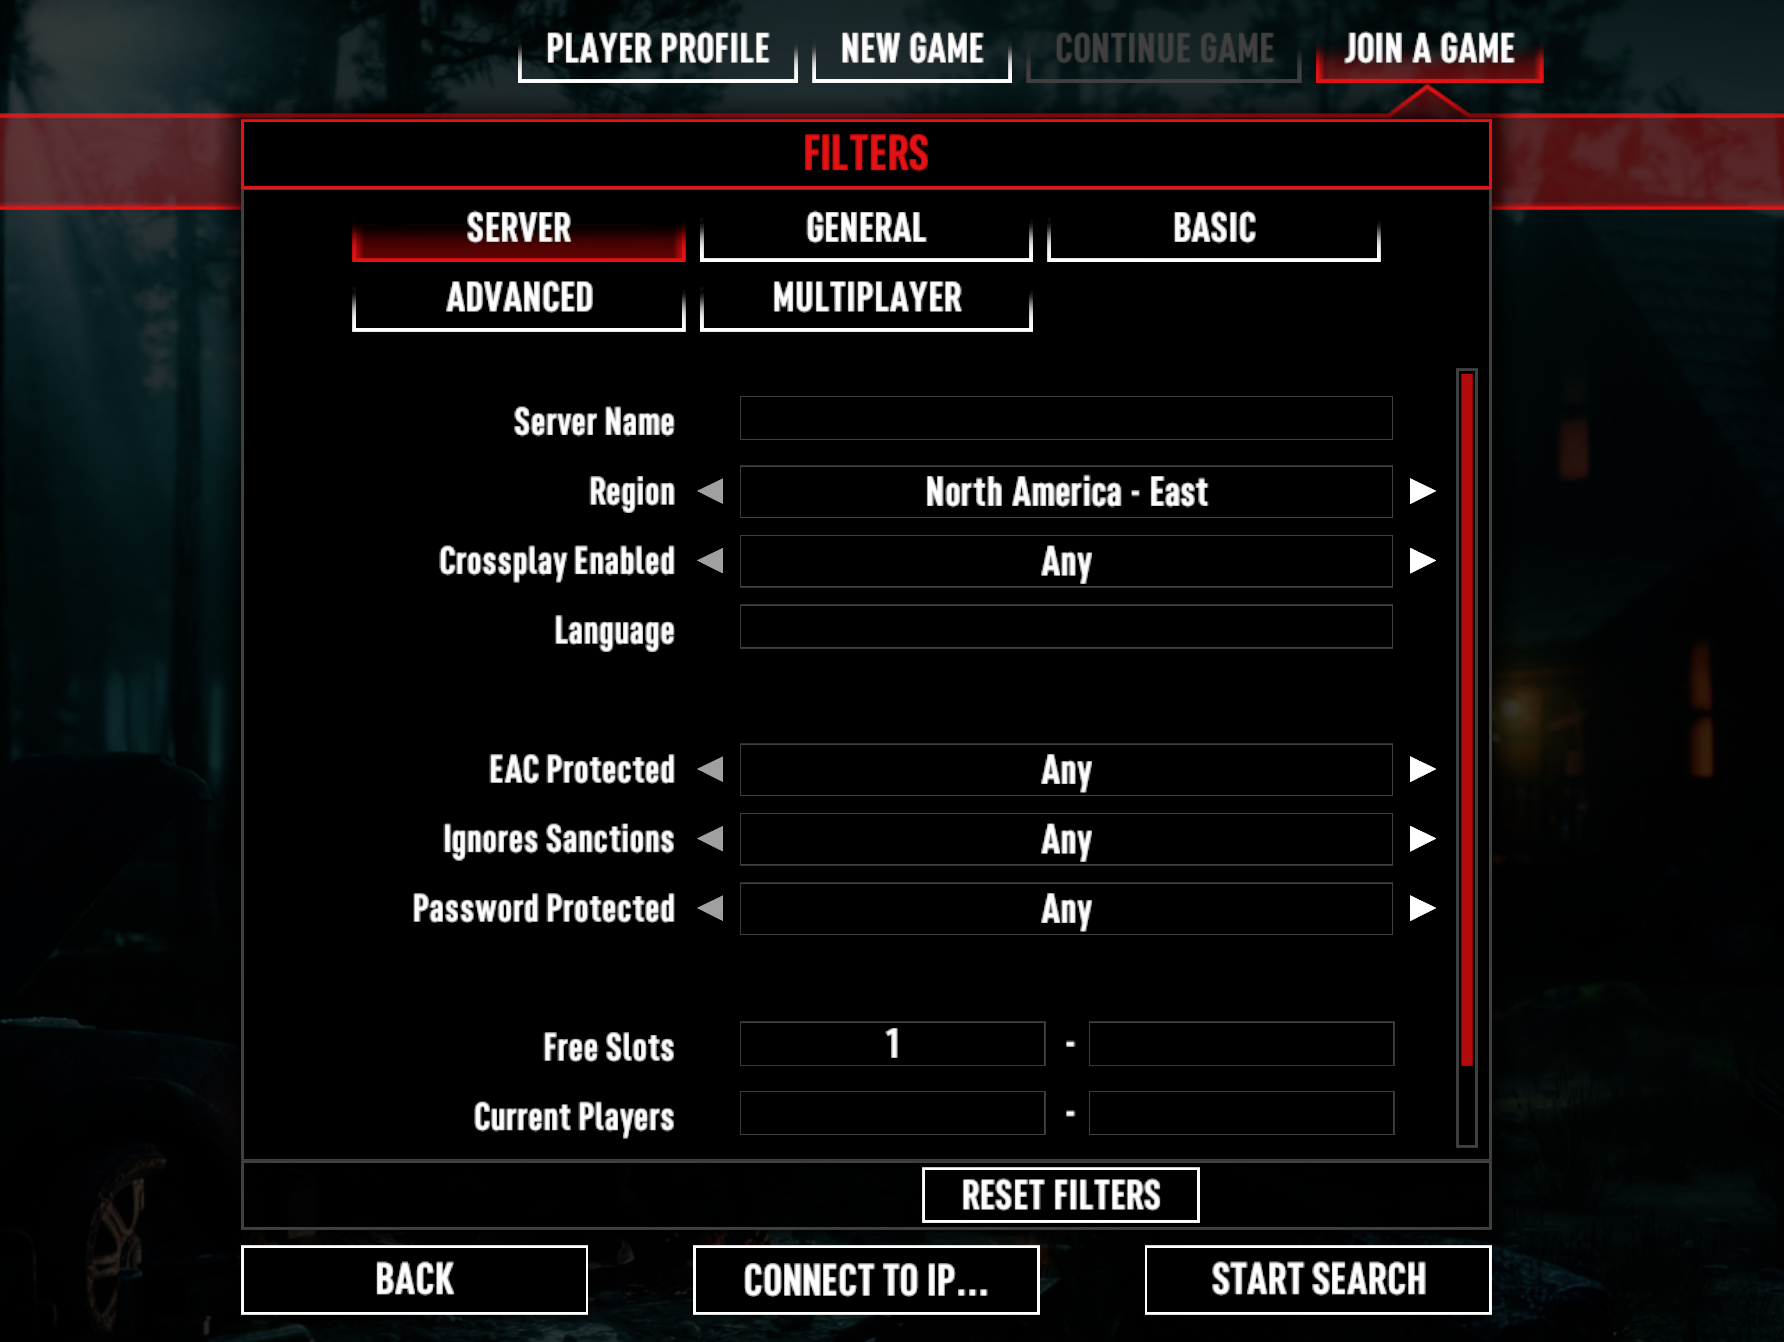
- Launch 7 Days to Die and choose Join a Game.
- Type your server name, or part of it, into the search field.
- Set the filter dropdowns to show everything rather than leaving them on the defaults. The browser hides servers by ping, player count and modded status out of the box — this is the most common reason people can’t find their own server.
- Select your server and click Connect. Enter your password if you set one.
3. Join by direct IP
Section titled “3. Join by direct IP”Use this when the browser won’t show your server, or when your server visibility is set to friends-only or unlisted.
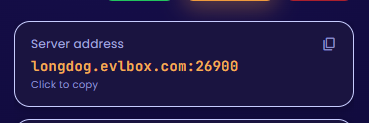
- In the Nitro panel, find your server address and port on the Console tab — it looks like
lunar.evlbox.com:26900. - In game, choose Join a Game.
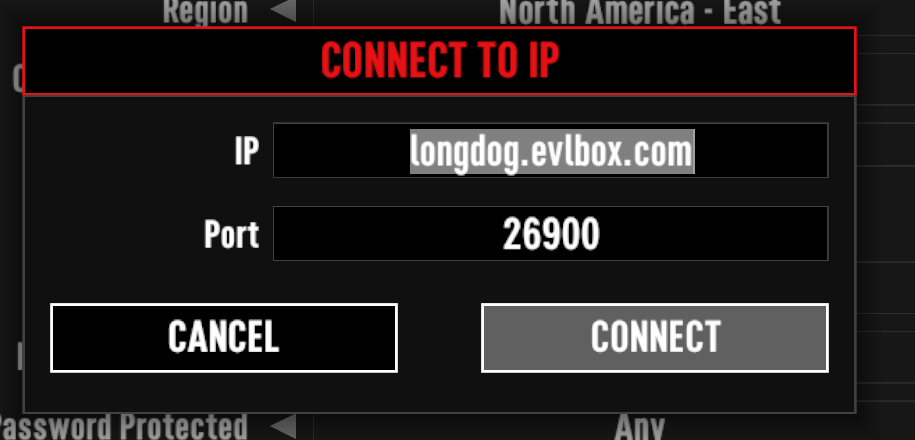
- At the bottom of the screen, enter the address in the IP field and the port in the Port field.
- Click Connect to IP.
4. Join from PlayStation or Xbox
Section titled “4. Join from PlayStation or Xbox”Console players can join, but only if your server meets every requirement The Fun Pimps set. Miss one and consoles simply won’t see the server — usually with no error to explain why.
| Setting (Startup tab) | Required value |
|---|---|
| Allow Crossplay | true |
| EasyAntiCheat | true |
| Max Players | 8 or fewer |
| Server Visibility | 2 (public) |
| Mods installed | None |
- Stop the server.
- On the Startup tab, set Allow Crossplay to
trueand EasyAntiCheat totrue. - Make sure the
Modsfolder is empty. Any mod present blocks console players even if everything else is right. - Start the server, then search for it by name in the console server browser.
The full requirements are published by The Fun Pimps at Crossplay Server Requirements.
Troubleshooting
Section titled “Troubleshooting”| Issue | What to check |
|---|---|
| Server isn’t in the browser at all | Set every browser filter to show everything. Confirm Server Visibility is 2. Give a freshly started server two or three minutes to register. |
| Not in the browser, but direct IP works | Almost always a client-side filter, or Server Visibility set to 1 or 0. |
| Shows in the browser but every join times out | If the console shows no errors and your password is right, this is a network setting on our side. Open a ticket and say the server is visible but unjoinable — that detail points us straight at the cause. |
| “Server is still loading”, or a timeout | The server is generating a world or downloading an update. Watch the Console tab until output stops scrolling. |
| Wrong password with the correct password | Trailing space in the Server Password field. Retype it and restart. |
| Console players can’t see it | Work through the table in step 4. Check for leftover files in Mods. |
| Kicked for a version mismatch | Your client updated before the server did, or the reverse. Restart the server to pull the latest build. |
| Stuck on “Creating player” | Usually a client-side mod mismatch. See How to Install Mods. |
Questions? Reach out on the support Discord or create a ticket.