
StarRupture Manage Server
Use the Nitro Panel to manage your EVLBOX StarRupture server. The in-game Manage Server screen is disabled in this setup, so a timeout there is expected.
To play, use Join Game → Dedicated Server with your server’s full numeric IP:port and Player Join Password. See How to Connect for the steps and screenshots.
Why is Manage Server disabled?
Section titled “Why is Manage Server disabled?”The in-game management interface uses a remote-control service with a reported security issue. EVLBOX’s configuration disables that interface and handles session loading and password setup through the panel.
You do not need to open the management TCP port or enable remote control to join your world. If Join Game fails too, follow the connection guide or contact support; a Manage Server timeout by itself does not mean the game server is offline.
Where to find each control
Section titled “Where to find each control”| What you want to do | Use this in the Nitro panel |
|---|---|
| Start, stop or restart the server | Console tab |
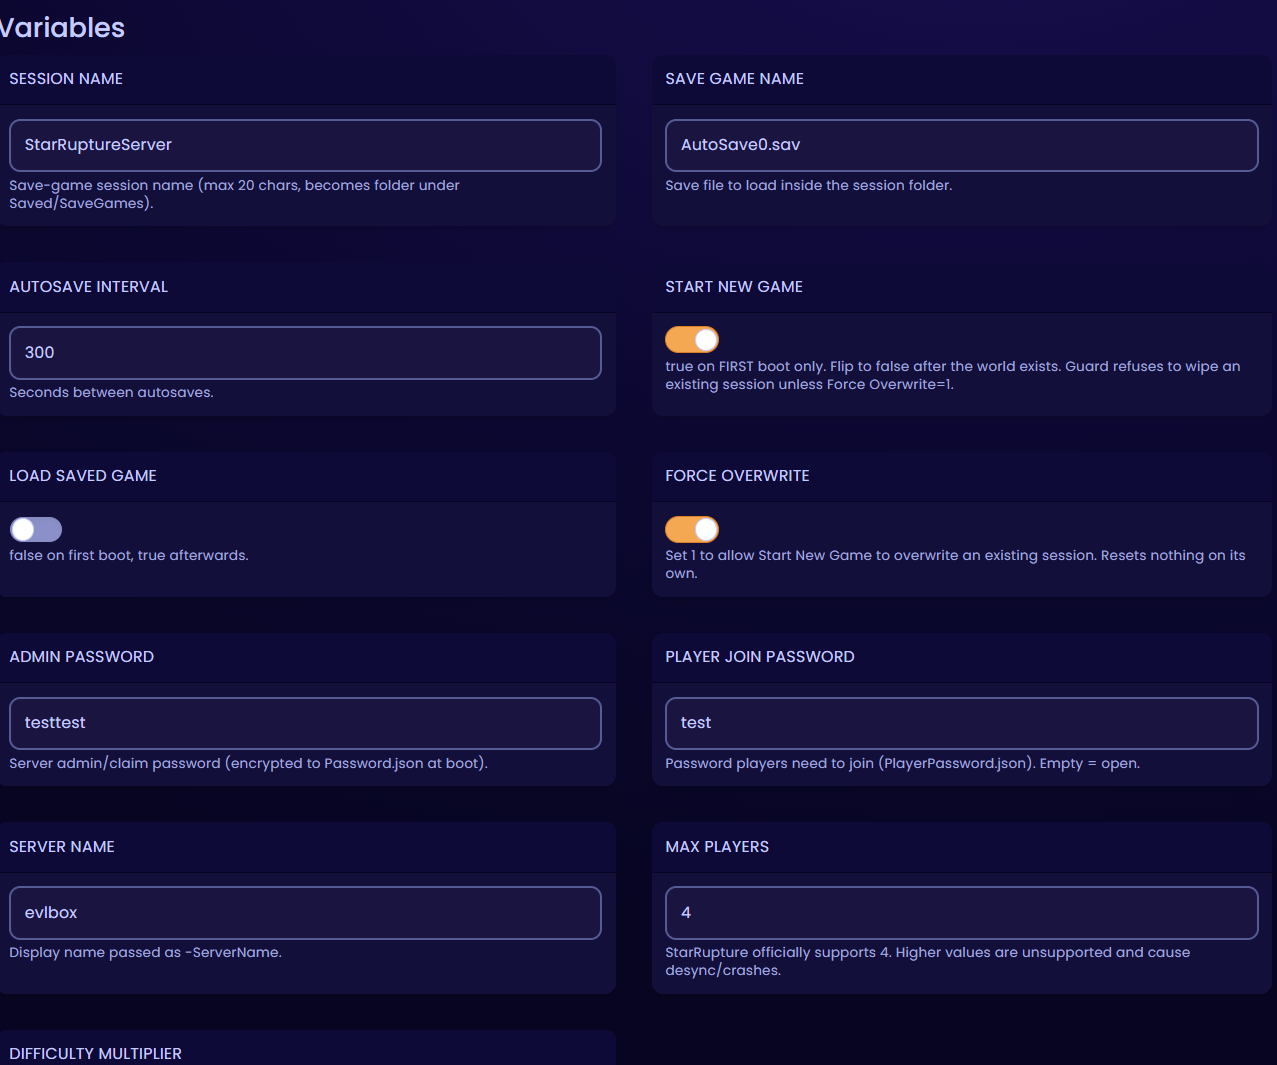
| Set the admin password | Startup → Admin Password |
| Set the password players use to join | Startup → Player Join Password |
| Create the first session | Automatic on startup when the session directory does not exist |
| Load an existing session | Automatic on startup with Force Overwrite set to 0 |
| Switch to another world | Stop the server, change Startup → Session Name, then start |
| Choose a save file to load | Startup → Save Game Name, inside the selected session folder |
| Adjust automatic saving | Startup → Autosave Interval |
| Upload or download saves | Files → StarRupture/Saved/SaveGames/ |
| Start a new world over an existing session | Follow the full reset procedure |
Set passwords through the panel
Section titled “Set passwords through the panel”- Open your server in Nitro and stop it.
- Go to Startup.
- Set Admin Password and Player Join Password as needed.
- Start the server to apply the changes.

The player password is the one your friends enter when joining. Setting an admin password does not enable the disabled Manage Server screen.
Use unique game-only passwords. The launcher sends them over HTTPS to the approved community password generator at starrupture-utilities.com to create the game’s password files. See Password settings for removal and failure handling.
What happens after a restart?
Section titled “What happens after a restart?”With Force Overwrite at 0, an existing session directory is loaded using Save Game Name. If the session directory does not exist, the launcher creates a new world. You do not need to open Manage Server and load the session by hand.
Session Name identifies the save folder, not the server’s display name. Changing it can select a different world. Before switching or uploading a save, follow Server Settings.
Reset the world
Section titled “Reset the world”Use the Startup tab to start over with a new world in the current session. You do not need the in-game Manage Server screen.
- Stop the server.
- Take a backup before resetting — see Creating Backups.
- On Startup, set Start New Game to
true, Load Saved Game tofalse, and Force Overwrite to1(on). - Start the server and join the new world. Make a save and confirm the save files exist before restarting.
- Stop the server. Set Force Overwrite back to
0(off), Start New Game tofalse, and Load Saved Game totrue. Start it again.
To keep the old world and start a separate session instead, see Run more than one world.
When to contact support
Section titled “When to contact support”If the panel shows Running but Join Game → Dedicated Server cannot find the server, recheck your numeric IP and assigned port. If it still fails, contact support with the error message and whether the panel shows Running or Starting. Do not include passwords.
If you can join but see the wrong world, stop the server and check Session Name, Save Game Name and your backups before changing reset settings.